























How to Choose the Right Nail Length for Timber, MDF and Sheet Materials
Choosing the right nail length may seem straightforward, but it can make a big difference to the strength, finish and reliability of a job.
If the fixing is too short, it may not hold properly. If it is too long, it can blow through the material, split timber, damage the finished face or leave sharp points exposed. For trade users working with timber, MDF, plywood, chipboard or other sheet materials, getting the fixing length right helps reduce waste, rework and callbacks.
At MTK, this is one of the common areas where customers ask for advice. The right answer depends on the material, the thickness, the application and the type of fixing being used.
In this guide, we’ll break down how to choose the right nail or staple length for timber, MDF and sheet materials.
Why Fixing Length Matters
The length of your nail, pin or staple affects how well the materials hold together.
A fixing needs enough depth to grip securely, but not so much length that it damages the workpiece or comes through the other side. This is especially important when working with thin sheet materials, finished panels, decorative trims or second-fix joinery.
Choosing the wrong length can lead to:
- Weak holding power
- Nails or staples pulling out
- Splitting in timber
- Blow-through on thin materials
- Surface damage
- Poor finish quality
- Extra filling, sanding or repair work
For production workshops and site teams, these small issues can quickly add up.
The General Rule of Thumb
As a simple starting point, the fixing should usually be at least double the length of the material you are fixing.
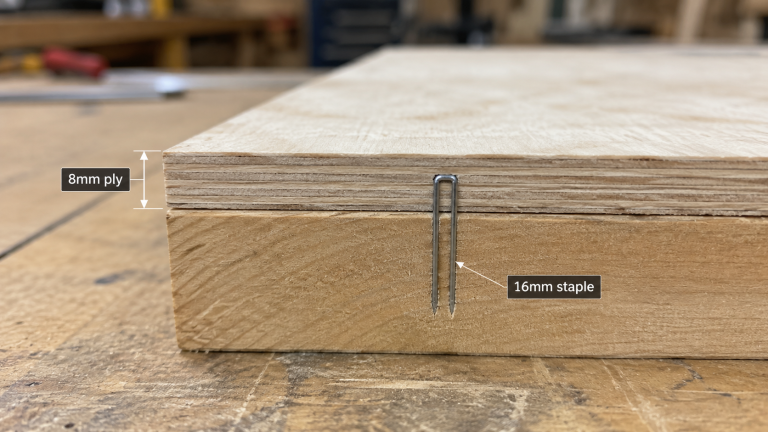
This is the key minimum rule: as a minimum, your nail, pin or staple should be double the length of the material being fixed. In some cases, trade users may go slightly longer for extra holding power, especially where the fixing needs more bite into the base material. However, double the material thickness is the practical minimum starting point.
For example, if you are fixing 8mm plywood floorboards, a good starting point would be a 16mm fixing, such as a 16mm narrow crown staple, depending on the tool and application.
This rule gives the fixing enough length to bite properly into the base material without being unnecessarily long.
This is not the only factor to consider, but it is a useful guide when selecting fixings for sheet materials, panels and workshop applications.
Choosing Nail Length for Timber
When fixing timber, the fixing needs to penetrate far enough into the second piece of timber to create a secure hold.
For general timber applications, consider:
- Thickness of the top material
- Density of the base timber
- Whether the timber is softwood or hardwood
- Risk of splitting
- Whether the fixing needs to be visible or hidden
- Whether the joint will experience movement or vibration
Softwoods are usually easier to fix into, while hardwoods may need more care with length, gauge and air pressure. A nail that works well in softwood may split hardwood or fail to drive cleanly if the setup is not right.
For stronger holding power, ring shank nails are often preferred, especially where movement or pull-out resistance matters. For cleaner finish work, brad nails or pins may be more suitable.
Choosing Fixing Length for MDF
MDF behaves differently from natural timber.
It is dense, consistent and easy to machine, but it can split at edges, swell if damaged, and mark easily if the wrong fixing or pressure is used. When choosing fixings for MDF, length and gauge both matter.
For MDF panels, trims and furniture components, avoid using fixings that are too long or too aggressive for the material. Overdriving can create surface damage, while fixing too close to an edge can cause splitting or bulging.
What to check:
- MDF thickness
- Distance from the edge
- Whether the fixing will be visible
- Whether adhesive is also being used
- Tool pressure or drive depth
- Whether a brad, pin or staple is more suitable
For fine finish work, shorter pins or brads may be used alongside adhesive to hold pieces in place while the bond cures. For stronger applications, a longer brad or staple may be needed, but it should still be matched carefully to the material thickness.
Choosing Fixing Length for Plywood and Sheet Materials
Sheet materials such as plywood, OSB, chipboard and hardboard are widely used in flooring, furniture, packaging, manufacturing and construction.
Because sheet materials are often thinner than solid timber, fixing length needs to be selected carefully. Too short and the fixing will not grip properly. Too long and it may blow through, create a poor finish or become unsafe.
The double-length rule is especially useful here.
If you are fixing:
- 6mm sheet material, consider around 12mm fixings
- 8mm sheet material, consider around 16mm fixings
- 12mm sheet material, consider around 24mm fixings
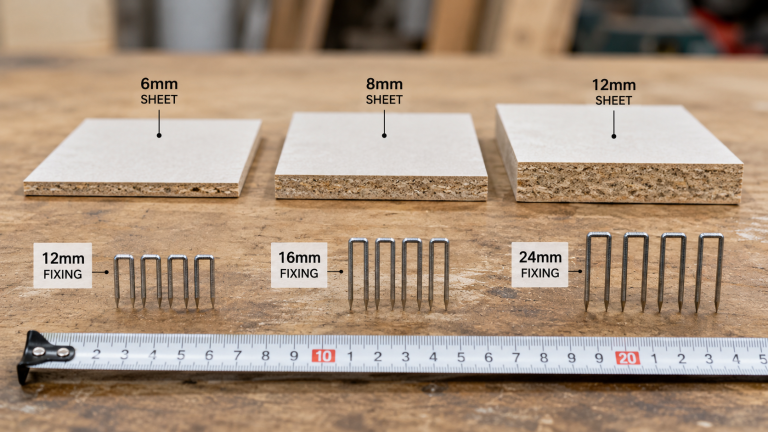
These are starting points, not fixed rules. The best choice will also depend on what the sheet is being fixed into, the fixing type and the tool being used.
Nails, Pins or Staples: Does the Fixing Type Matter?
Yes. The type of fixing changes how length should be considered.
Brad nails are often used for second-fix joinery, trims, panels and light assembly work. They provide more holding strength than fine pins but may leave a visible head that needs filling.
Pins and headless pins are better for fine finish work where appearance matters. However, they offer less holding power and are often used with adhesive rather than relied on alone.
Narrow crown staples are useful for sheet materials, flooring boards, backs, linings and applications where holding power across a wider surface is helpful.
Medium and heavy wire staples may be more suitable for heavier materials, furniture frames, packaging and other demanding applications.
The right length should always be chosen together with the right fixing type, not in isolation.
Don’t Forget Tool Compatibility
Even if the fixing length is right, it still needs to suit the tool.
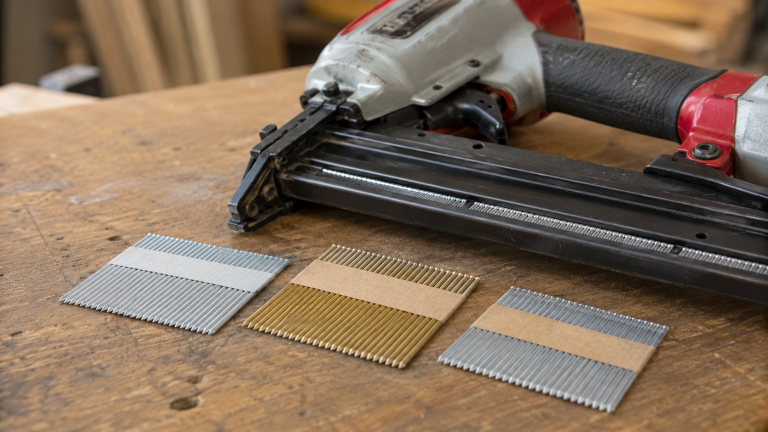
Every nailer or stapler has a specific fastener range. This includes length, gauge, crown size, collation angle and collation type. Using a fixing outside the tool’s specification can lead to misfires, jams, poor feeding or damage to the tool.
Before ordering, check:
- The tool model
- Accepted fixing length range
- Gauge or wire size
- Crown width for staples
- Collation type and angle
- Whether the fixing is suitable for the material
If you are unsure, it is always worth checking before buying, especially for repeat workshop use or bulk orders.
Quick Fixing Length Checklist
Before choosing your nail, pin or staple length, ask:
- What material am I fixing?
- How thick is the top material?
- What am I fixing into?
- Is the finish face visible?
- Is there a risk of blow-through?
- Is the material likely to split?
- Do I need strength, positioning or a clean finish?
- Am I using adhesive as well?
- Is the fixing compatible with my tool?
Getting these points right helps you avoid weak fixings, damaged materials and unnecessary rework.
Final Thoughts
Choosing the right nail length is not just about picking the longest fixing that will fit the tool.
The fixing needs to suit the material, the application and the finish required. As a useful rule of thumb, aim for a fixing around double the thickness of the material being fixed. So, if you are fixing 8mm ply, a 16mm fixing, such as a narrow crown staple, is often a practical starting point.
From there, consider the material type, tool compatibility, holding strength and risk of damage.
At The MTK Group, we help trade professionals choose the right fasteners for the job, whether you’re working with timber, MDF, plywood, sheet materials or production applications.
If you’re unsure which nail, staple or fixing length is right for your tool or material, our team is here to help.
Get in touch with our team on 0333 8000 345, email [email protected], or DM us on social media @theMTKgroup.